How To
Wishing Tree Pens
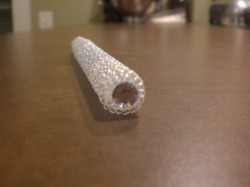
I didn't want just plain ballpoint pens for our guests to write with when they wrote their advice or wishes for us for our wishing tree. I asked around and didn't find anything I was crazy about so I decided to play around with a few ideas and this is the one I love! FI thought I was crazy stupid for spending time on something like this but I really think it was a detail worth doing.
Materials
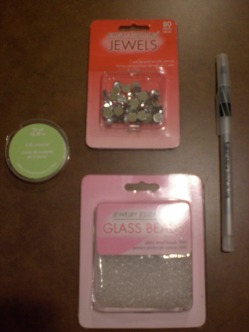
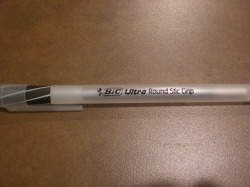
- Pens you want to use- I used Bic Ultra Round Stic Grip Ballpoint pens
- Clear string- I found mine in the jewelry aisle. It's 8lb and came in a spool of 20 yards
- Glass beads- I used clear glass seed beads 10/0
- Something for the end- 7 mm flat back rhinestones, also in the jewelry aisle
- Hot Glue
- Sand Paper
Time
I spent about an hour on each one so 5 hours total. It was really mindless though and went fast. The longest part was stringing the beads.
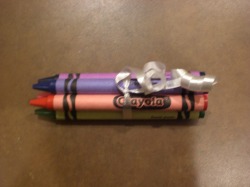
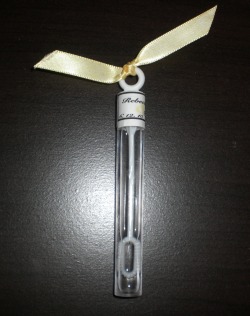
Step 1: Remove the grip and printed writing
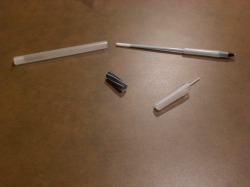
I made a trial one and I didn't do this step and I hated how it looked. You could skip this step if you're using a dark bead or one that isn't translucent.
Pull the cap off the pen and then pull the plastic part of the pen off of the tip. Remove the black grip and reassemble the pen. As far as removing the lettering I found that some course sandpaper worked really well. Don't worry about rubbing off some of the white part of the pen, you won't be able to tell once it's covered.
Pull the cap off the pen and then pull the plastic part of the pen off of the tip. Remove the black grip and reassemble the pen. As far as removing the lettering I found that some course sandpaper worked really well. Don't worry about rubbing off some of the white part of the pen, you won't be able to tell once it's covered.
Before

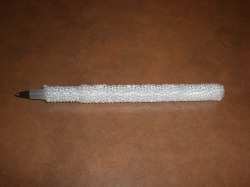
After
Step 2: String Beads
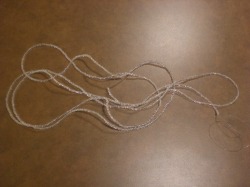
I measure out about 80 inches of the clear string to use. I know it seems like a lot but I need some extra on the ends to glue to the pen and it really does take a ton of string. You also should leave 1-2 1/2 inches between the last bead and the knot on the end.
Step 3: Secure the string of beads to the pen
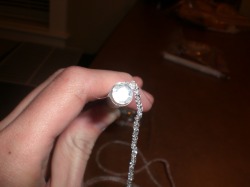
Put a dot of hot glue on the very end of the pen (the none tip end) and quickly put the extra string on the end of your beads into the middle of the glue, making sure that no beads are in the glue. Then put one rhinestone on top to sandwich the end. Wipe off any excess hot glue that seeps out, otherwise the beads wont lay flat on the pen.
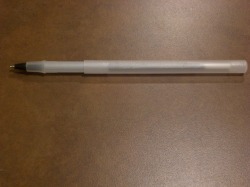
Step 4: Wrap and wrap and wrap and Glue!
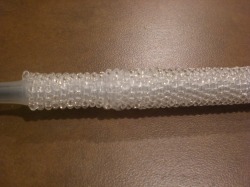
Wrap the strong around the pen until it's to the end. Near where the grip was you may need to add some hot glue to help the beads cover all of the pen without a gap.
Once you reach the tip of the pen put a small line of glue on the pen and press the end of string and the last few beads into the glue.
Once you reach the tip of the pen put a small line of glue on the pen and press the end of string and the last few beads into the glue.
Before
After
Wishing Tree Cards
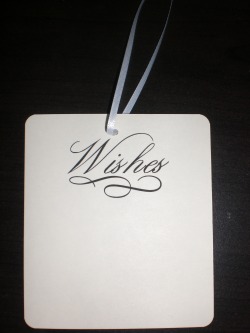
Business cards seemed WAY too small so I decided to make my own.
Materials
Cardstock- I used an ivory colored one
Ribbon- Super small white ribbon
Hole Punch
Corner Rounder
Ribbon- Super small white ribbon
Hole Punch
Corner Rounder
Time
1-2 hours. It took me a while to format my printer for it to print correctly on such an odd sized card
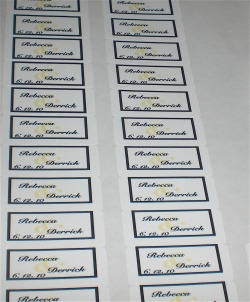
Step 1: Cut and Print

I really didn't want to waste paper with this project so I made sure that I got 6 tags per pages. I had to cut the paper to be 3.66 X 4.25. Then I ran them through the printer (I had to play with the settings for a while) to have "Wishes" and the flourish printed.
Step 2: Round the corners and hole punch
I personally think the rounded corners look much better. The hole punch I used isn't the normal sized hole punch either. It's about half the size of a regular one. There wasn't much space for a hole so it had to be small.
Step 3: Tie with Ribbon

I used plain white ribbon that you can buy at Michaels for $0.50 a spool and needed about 3-4 spools for 200 cards. I used about 5 inches of ribbon per card
Crayons for Kids' Coloring Book
Being a nanny I knew that there would be a few kids at our wedding and I wanted to make sure there was something they could do during the boring things (like toasts and first dance and such) so I made these after I saw a similar idea for stocking stuffers on the Mad in Crafts Blog!
Here is a link to the original inspiration! Mad In Crafts
Here is a link to the original inspiration! Mad In Crafts
Materials
- Crayons- I hate being a snob but the Crayola ones worked best for this project
- Cookie Sheet
- Silicone Mold - It helps so much when taking out the crayons after they're melted. I bought mine at wal-mart for about 7 dollars. It was in the Easter baking section. I originally tried this project with heart silicone molds that I found in the dollar bin at Target but the molds melted, even at a low temp. so beware.
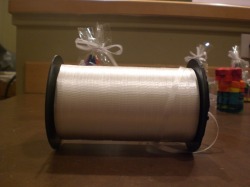
- Ribbon- I used plain white curling ribbon from Target
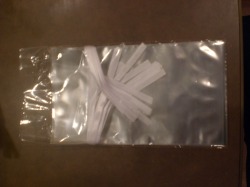
- Bags to put them in - I found bags with ribbon already attached at Michaels by their candy making section. They're marketed as lollipop covers but they work super well. 15 for $1.97
Time
Not a super time consuming project but it did take about 45 minutes but that does include baking time
Step 1: Peel the paper off the crayons and break into pieces
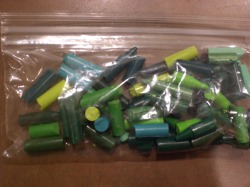
I used an exacto knife to cut a line down the paper of the crayons and just peeled them off. I also kept the same colors together so that there would be distinct colors but it's totally up to you. Also, when you break them into pieces keep in mind that the smaller the pieces the more the colors will melt together
Step 2: Put pieces in the mold and bake
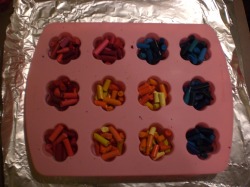
I'm not sure how many crayons I put into each mold but I think it was about 3-4. Put the mold on a foil lined baking tray and put into a preheated 225 degree oven. I checked mine every 10 minutes and then every 5 minutes the longer they were in there but it took about 20-30 minutes
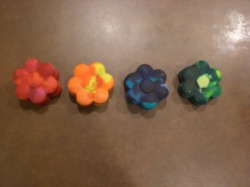
Step 3: Let cool, then remove from the mold
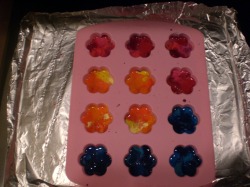
Let them cool for at least an hour or so. The carefully remove them and let them cool for about 20 minutes longer.
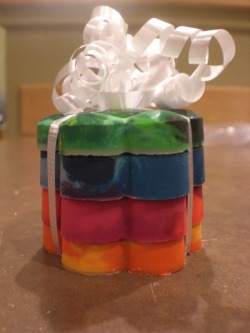
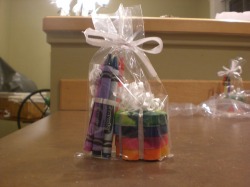
Step 4: Wrap together
I put 4 flower crayons together and tied them with the white curling ribbon. I also put 5 regular crayons together and tied those as well. I put both into the clear candy bags
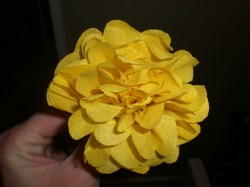
Tissue Pomanders
Like many of you I was totally drawn to the beautiful tissue pomanders that Future Mrs. Dudley made. I really wanted to add some color and decoration to our Jesus in HD style church and decided this was the best way to do it. I made yellow and white ones.
A huge thank you to Furture Mrs. Dudley for her instructions. You can link to her bio HERE
A huge thank you to Furture Mrs. Dudley for her instructions. You can link to her bio HERE
Materials
- Tissue Paper - I used about 6 packs total
- Wire
- Wire Cutters
- SortKwik
- Styrofoam Balls- I used 5"
- Ribbon
- Hot Glue Gun
Time
This was the most time consuming project by far. It's taken my FI, an amazing bridesmaid and myself over 50 hours to do. Cutting the paper alone took about 3 hours, folding them another 12-18 and then fluffing them up has taken the most time. Once the petals are fluffed up it only took about 30 minutes per balls to cover
Numbers
Because Future Mrs. Dudley gives such great instructions I figure I'll just give you my numbers and tips.
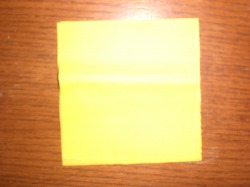
- 4" X 4" Squares of tissue
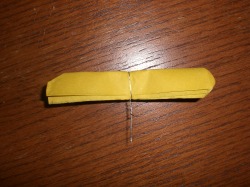
- 6 pieces per petal
- 2 inches of wire per flower
- 7 ft of ribbon per ball
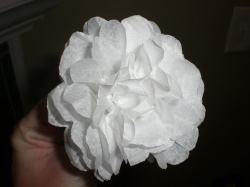
- 45-50 flowers per 5" ball
- 3-4 mini glue sticks per ball
Tips
- Use Kwiksort or another type of product that cashiers use. It will help with counting the sheets out and in pulling the layers apart. Also, it keeps you from licking your fingers
- Start on the bottom and work your way to the top so that the flowers on the top don't get squished when you do the bottom
- I also used a wooden dowel to poke holes in the styrofoam, then added hot glue and then pushed the fluffed up flower in.
The Squares
The Un-fluffed Flowers
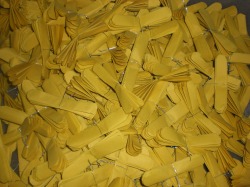
Just some of the yellow ones
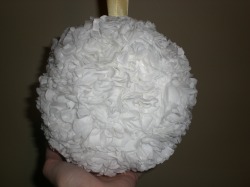
Fluffed Flowers
Bubbles
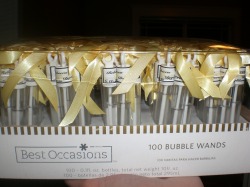
We bought bubble tubes from Wal-Mart and had just planned on tying ribbon around the top and calling it a day. However, we very quickly realized that the tops did not stay on very well at all and we needed a solution. So we printed our monogram on a sticker and put it just a tiny bit over where the cap met the tube and it sealed it shut until they're ready to be twisted off!
Materials
Bubble tubes
Ribbon- We used 5/8 inch ribbon from Michaels and cut it about 3-4 inches
Return address labels
Ribbon- We used 5/8 inch ribbon from Michaels and cut it about 3-4 inches
Return address labels
Time
1-2 hours for 200 bubbles between my FI and I
Step 1: Print Return address labels with a design or whatever you please
Paragraph.
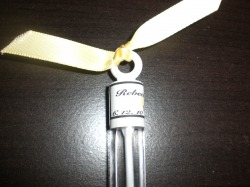
Step 2: Add label to seal the bubbles and tie on a ribbon!
Super easy to do. Just make sure the label over laps the top enough to keep it closed. We double knotted the ribbon to make sure it stayed on. We're also storing them in the same packaging they came in so that they all stay upright and together until the day of.
CardBox
I couldn't find a card box that I liked or one that I felt was worth $25+. I made my own after looking at a few online knotties
Materials
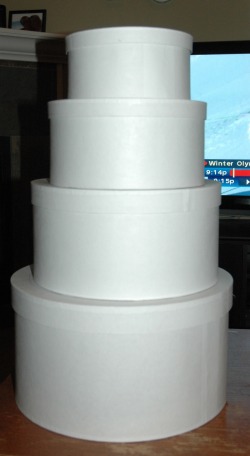
Paper Mache boxes- I got mine from Save-on-crafts.com
Paint- I used a matte acrylic and looking back I wish I would have just used a gloss one so I wouldn't have to spray it with a gloss finish
Acrylic Gloss Spray
Ribbon
Hot Glue
Exacto Knife or Box Cutter
Paint- I used a matte acrylic and looking back I wish I would have just used a gloss one so I wouldn't have to spray it with a gloss finish
Acrylic Gloss Spray
Ribbon
Hot Glue
Exacto Knife or Box Cutter
Time
About 2 hours. I did it alone and it tooks a ton of coats of paint but in the end I like it.
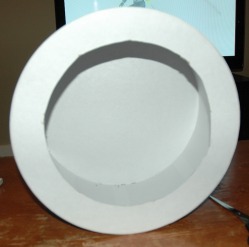
Step 1: Cut a hole in the box
I stack mine up and decided where I wanted the slot to be for the cards and then put masking tape on the area in the shape I wanted as a guide. I used a box cutter and an exacto knife to cut it out. Just be super careful with it.
I also had to cut a hole in the bottom of the box that had the slot for the cards and then make an additional hole that was just smaller then the slot box on the box below so that the cards could fall through
I also had to cut a hole in the bottom of the box that had the slot for the cards and then make an additional hole that was just smaller then the slot box on the box below so that the cards could fall through
Step 2: Paint and spray with gloss
It took about 4 or 5 coats for the yellow to be the right color and to not look streaky. Then I sprayed it all with a gloss coat.
Step 3: Attach ribbons and stack boxes
I used hot glue for this and it took a lot of it to make sure that everything was going to stay together but it worked out alright. I used ribbon to trim the edges and a HUGE roll of black ribbon to make the bow on top

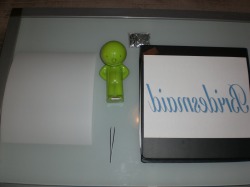
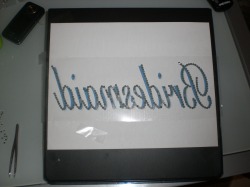
Bride and Bridesmaid Hoodies
I really wanted something to wear the day of while we all got our hair and make up done (My treat for my wonderful bridesmaids) I wasn't willing to pay a HUGE amount to buy them from someone so I Google around and found some great directions. When Old Navy had a sale on short sleeve hoodies I jumped on it.
I found my instructions HERE
I found my instructions HERE
Materials
Hoodie - Like I mentioned Old Navy had them on sale for $10 each
Hotfix Flat-back Rhinestones- I used 4 mm for the bridesmaids/ maid of honor and 3mm for mine (A mistake that turned out fine) I ordered them from eBay from Shelley World.
Mylar Paper- Also ordered from eBay
Binder
Words you want printed mirrors ( I don't have this setting on my printer so check out the "Tips" section for how I did it)
Tweezers
Time
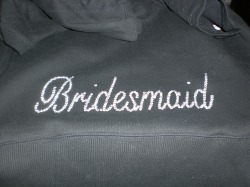
About 45 minutes per "Bridesmaid" Hoodie
50 minutes for "Maid of Honor"
An hour or so for "Mrs.Rad***** Est. 06-12-10"
50 minutes for "Maid of Honor"
An hour or so for "Mrs.Rad***** Est. 06-12-10"
Tips and Numbers
- To create the mirrored image I created a word art of what I wanted and used the Rotate button to change it
- For 3 Bridesmaid Hoodies and a Maid of Honor with their name and date on the sleeve I used about 2,000 4mm Hotfix rhinestones
- I used about 300-400 for the Mrs.Rad in 3 mm
- Make sure to take plenty of time when you iron it, I made the mistake of trying to take them off too soon and they didn't stick
- I used Shell Rounded for my font (At least I think that's what it's called) but played around a little with adding a few more rhinestones on the ends of letters to make it look a little different

Monogram
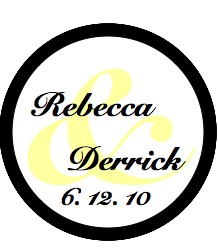
I really was not super computer savvy but loved the idea of a monogram. The video I posted was really a great starting point for me and helped me feel comfortable with the basics.
Create a monogram in PowerPoint
Create a monogram in PowerPoint
